Author Neal Stephenson, in his essay “In the Beginning… Was the Command Line,” memorably compares our graphical user interfaces to Disney theme parks: “It seems as if a hell of a lot might be being glossed over, as if Disney World might be putting one over on us, and possibly getting away with all kinds of buried assumptions and muddled thinking. And this is precisely the same as what is lost in the transition from the command line interface to the GUI. (p52)
With new programmers whose experience has been entirely mediated through an IDE like Visual Studio or Eclipse, I have sometimes wondered if they are understanding the “buried assumptions” and suffering from “muddled thinking” due to their lack of understanding of the basic command line operations that underlie the automation provided in the IDE. I still recall when I was that young developer, who had started with nothing but the command line, and realized that Visual Studio had crippled my ability to know how to build and test .NET Framework solutions (setting up an automated build process in Cruise Control helped cure me of that).
Many developers eventually learn the command line options, and the level of comfort probably varies greatly depending on the language. This article is dedicated to those who are trying to understand the basics across a number of different languages. It is also dedicated to IT workers who are approaching DevOps from the Ops perspective, which is to say with less familiarity with the developer’s basic toolkit.
TIP: an IDE is simply a GUI that “integrates” the source code text editor with menus for various commands and various panels to help you see many different types of additional project information all on one screen.
The Command Line Interface
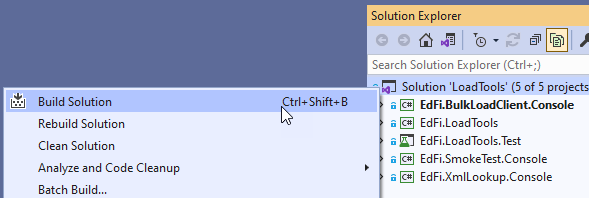
To be clear, this article is about typing commands rather than clicking on them. It is the difference between pulling up a menu in the IDE:
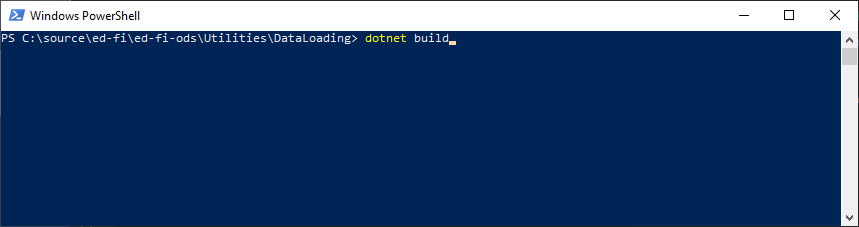
and knowing how to do this with just the keyboard in your favorite shell:
ASIDE: what do I mean by shell? That’s just the name of the command line interpreter in an operating system. Windows has cmd.exe (based on the venerable MS-DOS) and PowerShell. Linux and Unix systems have a proliferation of shells, most famously Bash.
Why would you want to use the shell when there is an easier way by clicking in the IDE?
- Perhaps counter-intuitively, it can actually feel more productive to keep the hands on the keyboard and type instead of moving back and forth between keyboard and mouse. There are probably studies that prove, and maybe even some that disprove, this assertion.
- Developing hands-on experience with the command line operations can lead to more control and deeper insights compared to using the IDE or GUI. Imagine the difference between learning to drive by hand and learning “to drive” by just telling your car where to go and what to do. What if the automation fails and you need to take over?
- Speaking of automation: some tools will help you fully automate a process just by recording your work as you click around. These might be fine. But again, I find that there is more control when you can write out the automation process at a low level. You get more precision and it is easier to diagnose problems.
- Occasionally we will find ourselves in a situation where a GUI is unavailable. This did not happen very often for people on Windows or MacOSX for the past several decades, but the emergence of Docker for development work has really helped bring the non-graphical world back to the foreground even for programmers working on Windows.
- Its what the cool kids are doing.
On that last point: honestly, I learned Linux back in the ‘90’s because I thought it was cool. That might be a terrible reason. But it is honest. Thankfully I didn’t have the same impression of smoking!
So the shell is a command line interface. And when we build specialized programs
that are run from the shell, we often call them “command line interfaces” (or
CLI for short) as
distinguished from “graphical user interfaces”. In the screenshots above,
we see the dotnet CLI compared to the Visual Studio GUI.
Common Software Build Operations
Build or Compile
Programming languages can be divided into those that are interpreted and those that are compiled. Interpreted code, often called scripts, are written in plain text and executed by an interpreter that translates the text into machine instructions on the fly. Compiled code must be translated from plain text into machine instructions by a compiler before it can be executed. This tends to give compiled code an advantage in performance, as the machine instructions are better optimized. But this comes at the cost of having to wait for the compilation process to complete before you can test the code, whereas interpreted code can be tested as soon as it has been written, with no intermediate step. Another difference is that the compiled code requires instructions on how to combine files, usually provided through a special configuration file.
Both paradigms are good. And both have command line interfaces that control many aspects of the programming experience. For the purpose of this article, the primary difference between them is the compile or build command that is not used for interpreted languages. In one sense, the CLI for compiled code essentially exists for the specific purpose of compiling that code so that it becomes executable, whereas CLI’s for interpreted code are there for the purpose of execution. Everything else they do is just convenience.
| Interpreted Example | Compiled Example | |
|---|---|---|
| Language | Python | Visual C++ |
| Source Code | print("hello world") |
#include <iostream>
int main() { std::cout << "Hello World!\n"; }
|
| Project File | not applicable |
 <Project DefaultTargets="Build" ToolsVersion="16.0"
  xmlns="http://schemas.microsoft.com/developer/msbuild/2003">
  <ItemGroup>
    <ProjectConfiguration Include="Debug|Win32">
        <Configuration>Debug</Configuration>
        <Platform>Win32</Platform>
    </ProjectConfiguration>
    <ProjectConfiguration Include="Release|Win32">
        <Configuration>Release</Configuration>
        <Platform>Win32</Platform>
    </ProjectConfiguration>
  </ItemGroup>
  <Import Project="$(VCTargetsPath)\Microsoft.Cpp.default.props" />
  <PropertyGroup>
    <ConfigurationType>Application</ConfigurationType>
    <PlatformToolset>v142</PlatformToolset>
  </PropertyGroup>
  <Import Project="$(VCTargetsPath)\Microsoft.Cpp.props" />
  <ItemGroup>
    <Compile Include="main.cpp" />
  </ItemGroup>
  <Import Project="$(VCTargetsPath)\Microsoft.Cpp.Targets" />
</Project>
|
| Compile Command | not applicable | msbuild example.vcxproj |
| Run Command | python main.py |
.\debug\example.exe |
Here are some sample build commands using various tools for compiled languages:
> # Java - simplest example
> javac myfile.java

> # Java and related languages - using Maven
> mvn compile

> # DotNet Core / .NET Framework 5+
> dotnet build

> # C and C++, old school
> make
TIPS: Every shell has a prompt indicating that it
is ready for you to type input after the prompt character; > and $ are two
common prompt characters. Thus when retyping the command, you would type “make” instead of
typing the literal text “> make”. The # symbol is commonly used to indicate
that this is a comment, and the command line interpreter will ignore that line.
Package Management
Modern software often uses purpose-built components developed by other people, a little like buying tomato sauce and pasta at the store instead of making them from scratch. To minimize the size of a software product’s source code, those components, which are also called “dependencies”, are not usually distributed with the source code. Instead the source code has some system for describing the required components, and both CLI and GUI tools have support for reading the catalog of components and downloading them over the Internet. These components are often called packages and the process of downloading them is called restoring or installing (as in “restoring the package files that were not distributed with the source code”).
Sample commands:
$ # .NET Framework 2 through 4.8
$ nuget restore

$ # DotNet Core and .NET Framework 5+
$ dotnet restore

$ # Node.js
$ npm install

$ # Python
$ pip install -r requirements.txt
The package definitions themselves are a sort of source code, and the “packaging” is usually a specialized form of zip file. A little like a compiled program, the package file needs to be assembled from constituent parts and bundled into a zip file. This process is usually called packaging. Then the package can be shared to a central database so that others can discover it; this is called publishing or pushing the package.
The following table lists out some of the common dependency management tools and a description of the file containing the dependency list for some of the most popular programming languages. Note that some languages / frameworks have multiple options.
| Language or Framework | Management Tool | File |
|---|---|---|
| .NET Framework (C#, F#, VB) 1 through 4.8 | NuGet | packages.config * |
| DotNet Core / .NET Framework 5+ (C#, F#, VB) | NuGet | *.csproj |
| Java, Go, Groovy, Kotlin, Scala | Maven | pom.xml |
| Java, Groovy, Kotlin, Scala | Gradle | build.gradle, or build.gradle.kts etc. |
| Python | PIP | requirements.txt * |
| Python | Poetry | pyproject.toml |
| Node.js (JavaScript, TypeScript) | NPM | package.json |
| Node.js (JavaScript, TypeScript) | Yarn | package.json |
| Ruby | Gems | *.gemspec |
… and I’ve left out more for Ruby, PHP, and other languages for brevity.
* In most of these cases, the dependency list is integrated directly into the main project file, except where noted with an asterisk.
Testing and Other Concerns
Most programming languages have packages that allow the developer to build automated tests directly into the source code. Normally when you run the software you don’t want to run the tests. So execution of the tests is another command that can be run through a CLI or an IDE.
Software is prone not just to bugs, which are (we hope) detected by automated tests, but there are also automated ways to evaluate coding style and quality. These processes are yet more bits of software, and they typically have a CLI. They include “linters”, “type checkers”, and more.
Many of these tools are standalone executable CLI’s. Here are some example commands for various tasks and languages:
> # Run NUnit style automated tests in .NET Framework code
> nunit3-console.exe someProjectName.dll

> # In a DotNet Core / .NET Framework 5+ project, can run these with tests
> dotnet test

> # Python has a concept called a "virtual environment". If you are
> # "in the virtual environment" you can run:
> pytest

> # Or if you use the Poetry tool, it will prepare the virtual environment
> # on your behalf. Longer command, but it does simplify things over all.
> poetry run pytest

> # And here's a Python lint program that checks the quality of the code:
> poetry run flake8
Project Files
Earlier I mentioned project files. These are always used with compiled code, and used with some interpreted languages as well in order to help manage and create packages. These project files provide information include:
- Name of the software
- Version number
- The project’s dependencies
- Compiler options
- Configuration for how to bundle the application into a package
Many of these project files allow you to build additional commands, sometimes
very sophisticated ones. A simple example is the set of scripts in a Node.js
package.json file:
{
  "scripts": {
    "prebuild": "rimraf dist",
    "build": "nest build && copyfiles src/**/*.graphql dist",
    "format": "prettier --write \"src/**/*.ts\" \"test/**/*.ts\"",
    "start": "yarn build && nest start",
  }
}
Typing either node run start or yarn start (if you have yarn
installed) will cause two commands to run: yarn build and nest start. The
first of these refers back to the second script, so yarn start is implicitly
running nest build && copyfiles src/**/*.graphql dist before running nest
start. Each of these is a command line operation, and the scripts here simplify
the process of using them. Yes we have a bit of abstraction, but it is all right
there in front of us in plain text and therefore relatively easy to dig in and
understand the details.
Project files can become rather complex, and some project files are rarely edited by hand. This is particularly true of the msbuild / dotnet project files for Microsoft’ .NET Framework / DotNet Core. For the purpose of this article, it is enough to know that project files exist and sometimes they include scripts or “targets” that can be run from the command line.
Command Line Arguments and Options
We’ve already seen arguments in several examples above. Here are some more:
| Command | Number of Arguments | Argument list |
|---|---|---|
tsc index.ts |
1 | “index.ts” |
npm run start |
2 | “run”, “start” |
dotnet nuget push -k abcd12345 |
4 | “nuget”, “push”, “-k”, “abcd12345” |
The last example introduces something new: command line options. An argument
that begins with -, --, or sometimes / signals that an “optional argument”
is being provide. Note that the first argument is usually a verb, like “start”,
“run”, or “compile”, and we can refer to that verb as the command. That last
example was also specialized in that the word “nuget” appears before the verb
“push”; this is an interesting hybrid command where the dotnet CLI tool is
being used to run nuget commands.
In this case, the -k could also be written in a longer form as --api-key.
Having both a short and a long form of optional argument is very common. The
string that follows -k, “abcd12345”, is the option’s value.
Some CLI’s have bewildering array of commands and options. This is where you
start to see the value of the GUI / IDE: at some point it is simpler to just
click a few times than remember how to type out a long command. Maven (> mvn),
for example, has so many commands that I can’t find a single list containing
them all. The DotNet Core tool (> dotnet) also has a lot of commands, each of
which has its own options, but these at least are centrally
documented.
To find more documentation, you can usually do a web search like “mvn
cli”. Or, most tools have help
available through a help command or an option:
$ sometool help
$ sometool -h
$ sometool --help
$ sometool /h
Just try those with the tool you are trying to learn about and see what happens.
Wrap-Up
Armed with this surface level knowledge, a new programmer or IT operations staff person will hopefully have enough background information to understand the basic operational practices for developing high quality software. And in understanding those basics from the perspective of the command line, the tasks and challenges of continuous integration will, perhaps, feel a bit less daunting. Or at the least, you’ll know a little more about what you don’t know, which is a good step toward learning.
Addendum
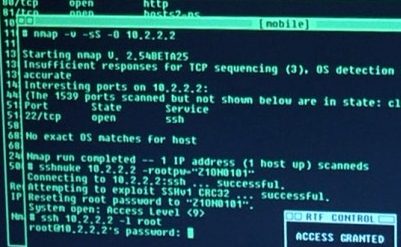
The first image in this article is a screengrab from the film The Matrix. That came out when I was actively working as a Linux system administrator, and I was thrilled to recognize that Trinity was exploiting a real-world security vulnerability that I had, a few months before, fixed by upgrading the operating system kernel on several servers.
Posted with : DevOps Tools and Practices, Tech, General Programming