Prompted by a class I’m taking, I decided to try running Python from Windows Subsystem for Linux (WSL; actually, WSL2 to be specific). Installing Python in Ubuntu on Windows was relatively easy, though I did run into a couple of little problems with running poetry. Bigger challenge: running graphical user interfaces (GUIs) from WSL. Here are some quick notes from my experience.
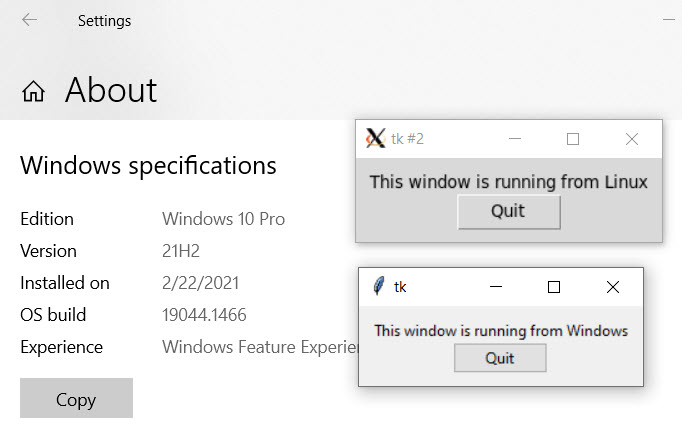 Screenshot shows that I’m running Windows 10, and shows a small GUI window opened
from both Powershell and from Bash using the same Python script.
Screenshot shows that I’m running Windows 10, and shows a small GUI window opened
from both Powershell and from Bash using the same Python script.
First Things: Installing Python in Ubuntu
Assuming you are already running Ubuntu in WSL, then the following commands will help install Python (all run from your Ubuntu/bash prompt, of course):
sudo apt update
sudo apt -y upgrade
sudo apt install python3 python3-pip
This will make the python3 command available in your path. I’m a fan of using
Poetry instead of Pip for dependency management. It can be installed in the
normal Poetry way.
I have a thing about typing python instead of python3, so I created an alias
in Bash: alias python=python3. However, Poetry does not execute commands
through Bash, so the command failed with an interesting error message [Errno 2]
No such file or directory: b'/usr/share/PowerShell/python'. Wonder why it
looked in a PowerShell directory?
Not surprisingly, there are others who like to type one character less:
sudo apt install python-is-python3
Now the python command works as desired, from Bash and from Poetry.
Enabling a Graphical User Interface
Executing a Python-based GUI app from WSL seems… a bit odd… but let’s run
with it, shall we? Because it is a requirement. We will need to use the tk
toolkit for this class. If I understand correctly, it is included in Python
3.9+. But I have 3.8. Most likely I could find a way to upgrade to 3.9, but I
don’t have a compelling reason yet, and the following command will install the
tk support.
sudo apt install python3-tk
Next: how does WSL open a GUI window in Windows 10? You need an X-Windows
compatible server for that. There are several proprietary and open source
options available. I chose to go with the open source
VcXsrv, which I installed in
Windows (not WSL) via Chocolatey: choco install vcxsrv.
Once installed, you need to run it via the XLaunch command, which will be
available in the Windows start menu. This Stack Overflow
post
has good suggestions for launching it correctly. I had to read through the first
few posts to get the steps right. The application prompts you for configuration.
Key values to use:
- First dialog: multiple windows, display number
0 - Second dialog: Start client
- Third: optional clipboard, native OpenGL yes (sounds good anyway), and disable
access control (unless you really want to go about configuring a user). For
the OpenGL support, you will need to set an environment variable in Bash
before trying to launch an application:
export LIBGL_ALWAYS_INDIRECT=1.
The answers mention opening the Windows Defender firewall to VcXSrv. The way they do this in the Stack Overflow post might be dangerous, especially in combination with disabling access control. A potentially safer* way is to simply allows WSL2’s network interface to access your local server. That means you are not opening your firewall to the Internet. This can be done with the following command, run from PowerShell in administrative mode:
New-NetFirewallRule -DisplayName "WSL" -Direction Inbound  -InterfaceAlias
"vEthernet (WSL)" -Action Allow
* I have not been in the business of writing firewall rules since the early 2000’s, so while I think this is correct, I might be mistaken. Please think through your security posture carefully before following this path.
Finally, back at the Bash prompt, you need to set the DISPLAY environment
variable so that the X-Windows commands will be redirected to Windows. This
variable will need to access Windows through the network, addressing the Windows
computer by server name or IP address. Typically one might think of using
“localhost”. However, WSL2 runs in an isolated network inside of Windows and it
does not recognize your Windows as “localhost”. So for this command you must use
the WSL2 instance’s current IP address. Here is a convenient command that will
read your IP address into the DISPLAY environment variable. The zero at the
end assumes that VcXSrv was configured to run on display 0:
export DISPLAY=$(awk '/nameserver / {print $2; exit}' /etc/resolv.conf 2>/dev/null):0
Now poetry run python -m tkinter should launch a little demonstration.
And for a more interesting demonstration, generating the windows shown in the image above:
import os
from platform import uname
from tkinter import Tk, ttk

root = Tk()
frm = ttk.Frame(root, padding=10)
frm.grid()

ttk.Label(frm, text=f"This window is running from {uname().system}").grid(column=0, row=0)
ttk.Button(frm, text="Quit", command=root.destroy).grid(column=0, row=1)
root.mainloop()
Setting Environment Variables on Startup
Two environment variables were created in this process. It would be tedious to come back to
this post and recopy them every time a new Ubuntu/Bash shell is opened. Linux has a simple
way of dealing with this: the .profile file contains instructions that run every time
you open a command prompt. There is also a .bashrc file that runs next, whenever you run
Bash (there are other shells that you could switch to, though Bash is the most popular).
Edit either one.
You will need to use a text editor such as
nano,
vim, or code
(if you don’t have it, typing code will automatically start the install of Visual Studio
Code). All are excellent editors. Those who are new to Linux will probably feel more comfortable
starting up Visual Studio Code. I use it all the time. But I also use the command line frequently
when I only need to edit one file. Knowing how to use nano or vim is a wonderful skill
to develop. Of the two, nano is easier to learn, and vim is more powerful. Whichever
editor you choose, open the file like so: code ~/.profile. The ~ instructs the operating
system to look for the file in your home directory.
Once you figure out which editor to use, just add the following two lines at the bottom of
the .profile file:
export LIBGL_ALWAYS_INDIRECT=1
export DISPLAY=$(awk '/nameserver / {print $2; exit}' /etc/resolv.conf 2>/dev/null):0
Save that. Once saved, you can immediately invoke it, without starting a new window,
with this command: source ~/.profile.
Posted with : Tech, General Programming, Linux, Windows